Saturday, October 18, 2014

New floor

In early September we worked really hard to get the kitchen, dining room, entry way and first floor hallway painted before the new hardwood floors were installed.  Jim Dewitz and his incredible team spent 2 days turning our ugly OSB (oriented strand board) and plywood floors into an incredibly nice hardwood floor.  

It was a great time watching them work together to bang out the floor.  In just a few quick hours the dining room and kitchen were almost done.  It was quite a feat to watch.  Sure Mark and I could have installed the wood.  It's easy, right.  Toss the wood down, nail it in and repeat.  But the key to almost any home project is having the right tools.  Oh, and years of experience doesn't hurt.  

Getting started was the hardest part

Working as a team - Jim, Nate and Mike
Jim and Mike laid the wood out while the Nate nailed them in 

I can only imagine how long it would have taken Mark and I to do this.  And would it have looked as nice????  Hard to say!

The floor is a mix of 3" and 4.25" #2 Red Oak boards.  The boards have quite a bit of variation in color with streaks of grey throughout.  We opted against the hand-scraped wood that goes through a process to make it rough but the assortment we received has a great deal of natural markings from knots, worm holes and other things that happened to the tree in the forest.  Can't wait to see how it looks after it is finished.

Lots of character - knots, worm holes, variations in wood color 

By the end of the first day, the kitchen and dining room were finished.  The guys just got started in the hallway then called it a day.  They came back the next day to do the hallway and thought they'd be done by lunchtime.  Oh if only it was so.  With two closets and the stairs they ended up working most of the day to finish the installation.  Working around the metal of the stair railings and into the closets takes so much longer than the straight forward rectangle of the kitchen and dining room. 

Here's how it looks now.
Dining room looking from the kitchen

Kitchen (with our new fridge!!!) 

Front Entryway
It's great to have the floors installed so that we aren't walking on staples, nail heads and rough wood just ripe for giving bare feet slivers.  We can actually was barefoot or in our stocking feet now even though the floor has not been finished. 

Next week (week of Oct 20th) the installation of the kitchen cabinets will get started.  Once the cabinets are in, Jim and his crew will come back to stain and polyurethane the floors.  

Up next..... fireplace installation.


Thursday, October 2, 2014

Let the painting begin


Mark and I worked with our Interior Designer to choose colors to paint the interior walls.  We started in the basement (so we won't see our mistakes as often). Using the stone from the fireplace and the carpet that we had previously chosen, we selected a color scheme for the whole level.  We decided to highlight the south wall in the family room by painting it a darker color.  The other walls as well as Matt's room would get complimentary colors.  

Here's how it looks.

South Wall of the family room

Another shot of the south wall

North wall of the family room
At the end of the room we will have a fireplace with the TV above it.  We will eventually have built in cabinets on either side so we don't have to paint those spaces.  Mark decided to do his best Picasso impersonation and has created a masterpiece by emptying out his roller each time he changed colors.  As you can see they really do look nice together.

Finishing up the family room
Next on the paint list was Matt's bedroom.  We let Emily choose her bedroom color and told Matt he would get to also.  But he went to Australia and our designer suggested a color that would look nice with the rest of the basement so we went with it.  Quite honestly, I forgot that I told Matt he could choose (of course, he "reminded" me) so I really hope he likes it when he gets home.  

Matt's Bedroom

Another shot of Matt's room.  Should make for a nice guest room once he is out on his own
We painted the hallway as well but I couldn't get very nice pictures of it as we have no lights there yet and it just doesn't look very good with the super bright halogen light (the one that is blinding Mark in the picture above).

Then we moved upstairs.  Again we had a consultation session with our Designer taking into consideration our cabinet color (white), granite color and the tone of the wood floors.  The first floor area has 3 colors as well (we didn't set out to have practically every room be different but it worked out that way.)

We started with the kitchen, dining room and foyer/hallway so that we could get the painting done before the hardwood floors were installed. We started in Friday afternoon and had to be done by Monday morning so I neglected to take pictures of the kitchen and dining room in process.  

We finished in time then took a two day break while the floors went in (see next post for that project). Then we started painting again with the foyer and living room.

I could almost reach all the way to cut in along the ceiling but not quite.  I was too scared to lean off the 10' ladder any more.  Mark had to finish it.

Standing on a "not very wide" board just isn't for me! We are really lucky Mark isn't afraid.
I only wish that this was the hardest area to paint.  Not so! Painting the Living Room required that we rent scaffolding to get the job done. The day before we painted I had a couple of accidents with sharp objects (one while cooking and the other while changing a razor knife blade) so Mark wouldn't let me go up on the scaffolding with paint.  I can't say that I was disappointed.  He did the cutting in for the areas that I couldn't reach using the 10' ladder and then I helped out with the lower parts on the west and east walls as well as the south wall.
Mark finishing up some cutting in while I worked on the 10' ladder

It was a lot of fun maneuvering the scaffolding around the new ceiling fan.  Should have waited a couple more days before we put it up. 

North wall mostly done
Now we are ready for hardwood floors and the two fireplaces.  Those posts will have to wait till early next week as I need to go to bed so I can get up bright and early tomorrow for our annual trip to Duluth with the Thompsons.

Thanks for reading.


Bringing in the Professionals

I really wanted to be gone for this part of the project but hey if I was I would have missed out on all these great photo opportunities. As I mentioned in my last post, we have a second crew that is going to complete the mudding and taping.  Matt V. started by making a pass over all the screw holes, taping and mudding all the seams, putting on corner bead and mudding that and then letting it dry.  He brought in giant fans to help everything dry.  Being August in MN you know we had just a bit of humidity. He worked a couple of days then the scaffolding came in to reach the ceiling.  I missed getting pictures of them scraping the ceiling.  It was a huge mess but they put down plastic (on top of the protective paper) so cleaning it up wasn't that bad. Unfortunately for Matt he had to use the hose in the backyard to clean himself off.  He was covered and because it was so hot, it all stuck to him.  Not a good time.

Matt working where I hope to never have to go!


Making sure the ceiling is ready for knock-down texture

Day after day of sanding but at least he has the right tools. Sure beats up and down on the ladder
Randy up at the ceiling in the foyer scraping off the old texture

Finishing up the sanding then the ceilings will be sprayed and knocked down

These pictures make it seem really simple but they worked really hard to get all the taping, mudding, scraping and sanding done.  Then everything was prepared so they could spray the ceilings.


All of the windows were covered in plastic

The railings were draped with plastic

Library ready for ceiling texture
More plastic covering things we didn't want covered in texture
Not sure what Mark was looming at in the picture above but it must be good.  Or perhaps just a surprise!

Emily's bedroom is the only room that wasn't part of this project so her door got plastic over it to keep the mess out!
The office ceiling ready for texture and the walls are ready for paint (primer)

Another shot of the office
As if this wasn't enough.  The master bedroom was done as well.  I had to plan ahead and put a couple of days worth of clothes in Emily's room because our cabinets were covered in plastic throughout the texturing and priming process.  Yes, we actually lived here while all of this was going on.  I wouldn't do it again.  Better to get a hotel room for this part!
No sleeping in this bed for quite some time.  We moved into Matt's new bedroom in the basement with unpainted walls and a cement floor.  There was a tarp on the floor so it was OK!

Closet and clothing cabinets getting covered too.
The living room furniture (what little we have) was moved into the dining room and covered with plastic.  It really was a mess.  You couldn't sit anywhere for a couple of days.  


Main floor hallway with dining room on the right

Main floor hallway and stairway to the basement after being mudded
I didn't get any pictures of Matt and Randy putting up the knock-down ceiling.  It was loud and messy so I left and just got to see it when it was done.  Then they went on to spraying and rolling primer paint on the ceilings and all the new sheetrock.
Randy was the master of the giant paint roller.  

No way I am standing up there and swooshing that thing back and forth!

The end result was beautiful.
No more Salmon colored walls in the living room.  Almost looks like a finished house

The library area hasn't been this clean since before we moved in

The kitchen has a newly painted ceiling.  The walls were only primed where we won't have cabinets or backsplash

Kitchen back in working order.  
The mess on the floor from the Mitchell team drove me crazy. But I guess that is what happens when work gets done and you aren't home.  The entire surface was white when we got back.  We spent several hours (with my mom helping us) scrubbing the floor at the far end of this area and off the cement floor in the basement.  The part that is still white is on plywood which we can't scrub.  Trust me, I would have if I could. 

To prevent the rest of the house from looking like this, Mark and I spent quite a lot of time lining the floor of the living room, library, office, master bedroom, hallways and each individual step with rosin paper before Matt and Randy started.  It really made the clean up so much easier.  Simply roll up the paper and throw it away.  Most of the mess went with it.  There was just a little bit of vacuuming to do around the edges.

Now we are ready to paint.  Mark and I are quite a good team.  I cut in at the ceilings and corners and he uses the roller on a stick to paint the main areas.

Tune in again to see what colors we picked.


August 2014 Continuing towards painting

The night before we left on vacation, we got a little bad news from the "Mitchell Boys" -  who really aren't boys but rather a father and son team that Mark has done rehab jobs with when he was working with DH Homes.  The father is in his 60's and the son is a bit younger than Mark.  It took a bit of effort for Mark to get in touch with them as they were on vacation in Florida for a wedding.  But he did manage to schedule them to come out to see the house and give us an estimate on Wednesday July 30th (we left for vacation on the 31st).  They took a look and told Mark they would call later that night with the estimate.  Well, they called later that night but instead of giving us an estimate, they told Mark that they didn't want to take the job on.  It was too much up and down - work on all 3 levels - and would require scaffolding - high ceilings in living room, office and foyer so they just weren't interested.

As we drove to NY the following morning, Mark told me about the conversation (he kept it to himself Wednesday night!) and we were lamenting that nothing would get done while we were gone and thus we would be home the entire time that nasty work was being done.  I came up with a possible compromise.  I asked Mark to call Mr. Mitchell back and ask them what they WOULD do.  We had them cherry pick the job and do as much as they would like.  They said "OK we will do the basement and kitchen walls and put on a knock-down ceiling in those two areas."  We weren't quite sure when they would be working but we left them a way to get into the house.  We didn't hear from them at all while we were on vacation so we weren't sure what we would encounter when we got back.

I wish I had pictures but I guess I forgot to take them.  However, we came home to a basement completely taped and mudded with a beautiful knocked-down ceiling.  The kitchen was all done as well.  But now what do we do.  There was a lot of hard work left to do -- Living Room with the giant ceiling, office, foyer, master bedroom.  Plus there were ceilings that still needed to be scraped.

Mark talked to Tim (my brother) and Tim suggested Matt V.  Unfortunately Tim didn't have a phone number but he knew that Matt worked at Sherwin Williams in Chanhassen.  Mark called SW and they had a Matt V. that worked there 5 or 6 years ago.  Nope they didn't have a phone number for him but they could tell us that his last name was "Vavrecheck" but no idea how to spell it. Good thing we live in the age of the internet.  We got on Facebook, LinkedIn and dexonline.  On Facebook we found a guy in Virginia, nothing on LinkedIn but we hit the jackpot on dexonline.  We found Matt Vavrichek but he had no phone number listed.  Dang.  Next step.  Look at all the people he is "associated with" on dexonline and we found "Karen" who happened to be his Mom.  Moms are always there when you need them.  She took Mark's name and number and passed the info to Matt.  Such a good mom.  She wouldn't give out her son's info to some stranger.  Lucky for us, Matt was happy to take on our job with his buddy Randy.   And they could start in a week or so.

While we waited for Matt and Randy to get started, I scraped the ceilings that I could comfortably reach - Master bedroom, part of upstairs hallway and a bit in the main level hall way.
Getting started with scraping in the master bedroom
Little bit of water and it comes right off


One afternoon and the job was done

While I worked on ceilings, Mark removed the track lighting, centered the fixture and added a new housing for the ceiling fan we were planning for the living room.
Good thing Mark had a skinny arm that can fit up in the ceiling to find the wire and pull it out.

Is it safe to stand on that step?  Wait that isn't even a step! 
Now it's time to bring in the pros.


July 2014 Sheetrocking

Has it really been almost 4 months since I last wrote?  Perhaps I need to change my middle name to "inconsistent" or "procrastinator".  Might be safer if I just don't commit to a next posting timeframe.

OK on to what has been going on here.  It was kinda fun looking back at the pictures from early July to see where we were then verses where we are now.  Wow!  What a difference.  

Beginning the sheet rocking process

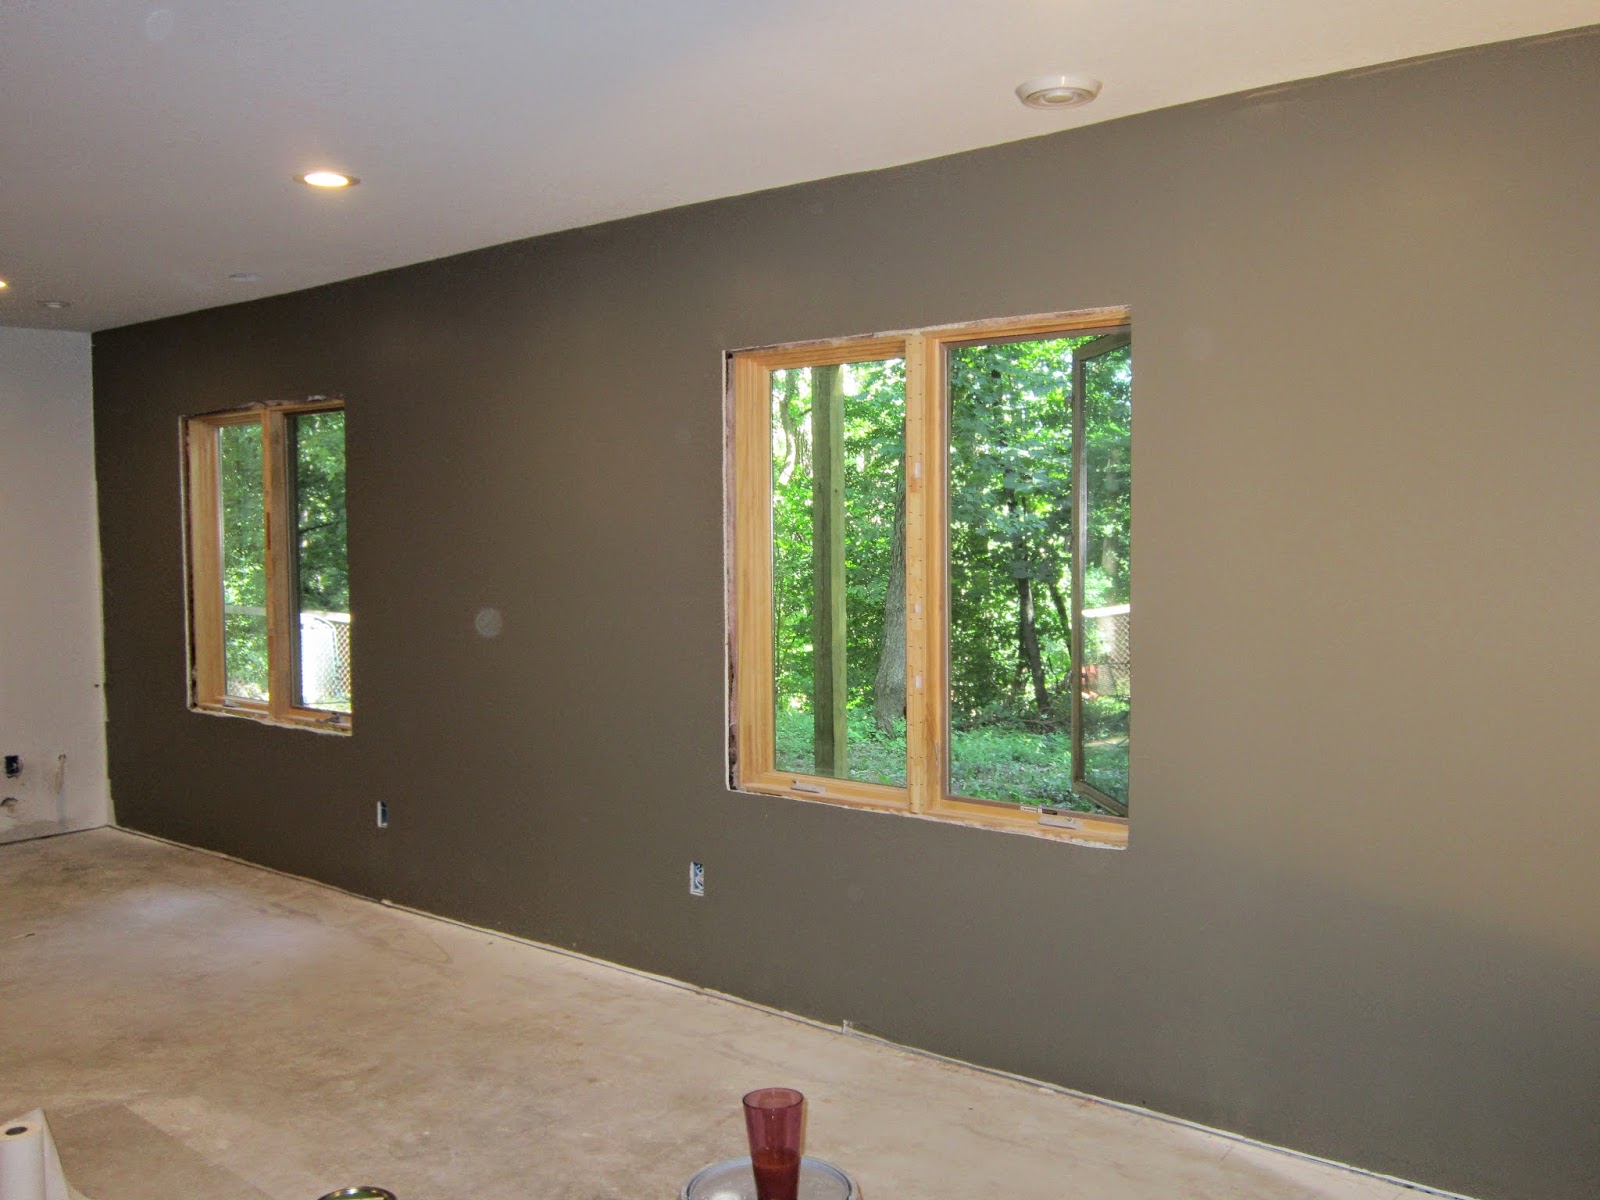
Finished walls. Almost looks like a house that someone lives in

Of course, it took a lot to get to this point.  Lots and lots of sheetrock, mud, dust, sweat and even a few tears but only one slammed door.   Almost the entire month of July was spent sheet rocking.  We started in the office since there was only one wall to do.
Eventually this will be our office but it was Matt's bedroom this past summer
Then the tools, ladders, mess and all the workers (Mark, Tim, Matt and me) moved to the library and living room on the main level.
Front wall done and west wall started.  These sheets were 54" wide so it went faster but they were really HEAVY.

Mark and Matt hanging in the Living Room.

Few more sheets and Living Room was done. 
Many people thought we were nuts for hanging the sheetrock ourselves instead of hiring someone to do it.  But it really is a satisfying job especially when the going rate for tradespeople seems to be $1000 per day.  We saved a lot! (Money that is but certainly not time :-))

Next up was tackling the basement.  Every square inch (even the ceiling) needed sheetrock as there was none remaining due to all the water damage.  

We started with the ceiling (the area that is pink)
Two passes done, one to go

The ceiling was slow because there were 10 lights to cut out.

The sheetrock lift made the job much easier as there is no way we could have held it up there correctly
Final strip is all that is left then on to the walls

The walls are done top to bottom.  
It was a bit of a pain working in the area because there were piles of sheetrock on the floor and against multiple walls and we kept having to move them.  But each sheet hung was one less that might be in the way later. 


Most home improvement jobs that Mark and Tim complete are done better/faster with beer (or so they think)

All finished in the family room.  Lots left to finish the bathroom and hallway.

Once the family room was done, the efforts shifted to Matt's new bedroom.
First the ceiling
Then the walls

And the ledge
All that is left is the closet

Basement all finished (looking into Matt's new Bedroom)
One room left in the lower level-- the bathroom.  I think this area may have taken just as long as the whole family room.  The room is pretty small with a section of the ceiling that is lower which made getting the lift in there and moved around quite trying. 

Mark left a surprise in the wall for the next homeowner to find.

The newspaper and change is boxed into this corner of the bathroom (those pipes are coming out of the bathtub)
It was a bit tricky taking pictures in such a small space as well.  The picture below shows part of the tub surround which was done in Durrock (cement board that is mold resistant) and part of the wall getting done in sheetrock. 


Measuring and cutting for the bathroom

One final piece and the basement sheetrocking job is done

Once the basement was done we moved to the kitchen and then the Master Bedroom. Part of the kitchen ceiling was replaced as we removed soffits and had to fix some of the ceiling joists.  

Sheetrock lift in action helping us get the ceiling sheet rocked
We put a shorter row of sheetrock at the top and the bottom of the kitchen so that we would be able to hide the seams behind the upper cabinets and lower cabinets.  This makes mudding and taping much easier as those seams don't have to be perfect.


Two courses done, one to go

Working on the last section
Once the kitchen was complete, the end was really in site.  All that was left was to replace the ceiling and 2 walls in the master bedroom. 

Getting started.  All the yellow will be covered up

Ceiling is patched.  No more insulation floating through the house

East Wall complete

South wall done

No more sinks INSIDE the bedroom. Pipes are removed and the wall is re-sheetrocked
I must have been too busy helping put the sheetrock up here so I didn't get any "in progress" pictures.

Now the "satisfying" part is all done and the messy step starts.  The walls are all sealed up but before we can paint (I can't wait to get rid of the salmon colored walls) we have to have all the seams and screw holes (many hundreds of them) taped, mudded and sanded.  This step is the complete opposite of satisfying and we want no part of it.  We completed sheet rocking July 26th, just in time to go to White Lake, NY for vacation.  The plan was to have "the Mitchell boys" do all the taping and mudding while we were gone.  I was imagining how great it would be to come home from vacation to find all the work done and the mess all cleaned up.  

Tune in to my next post to see how it turned out.