Sunday, September 22, 2013

Preparing for New Windows

We are really excited to be adding new windows to our house.  In order for a new window to be put in we have to build a header.  Don't know what that is????  Yes, it is when you hit the ball with your head and it goes into the goal.  It is also when you fall off the deck because there is no decking on it.

But in this scenario, it is a big beam-like thing that spans horizontally across the top of a window or door (or fireplace - more on that later).  Most of you will never see one because they are covered with sheetrock (the stuff walls are made of) and thus hidden.  I have learned how to make a "sandwich header".  It is comprised of a 2 x 4 on top, 2 2 x 10s in the middle and another 2 x 4 on the bottom.

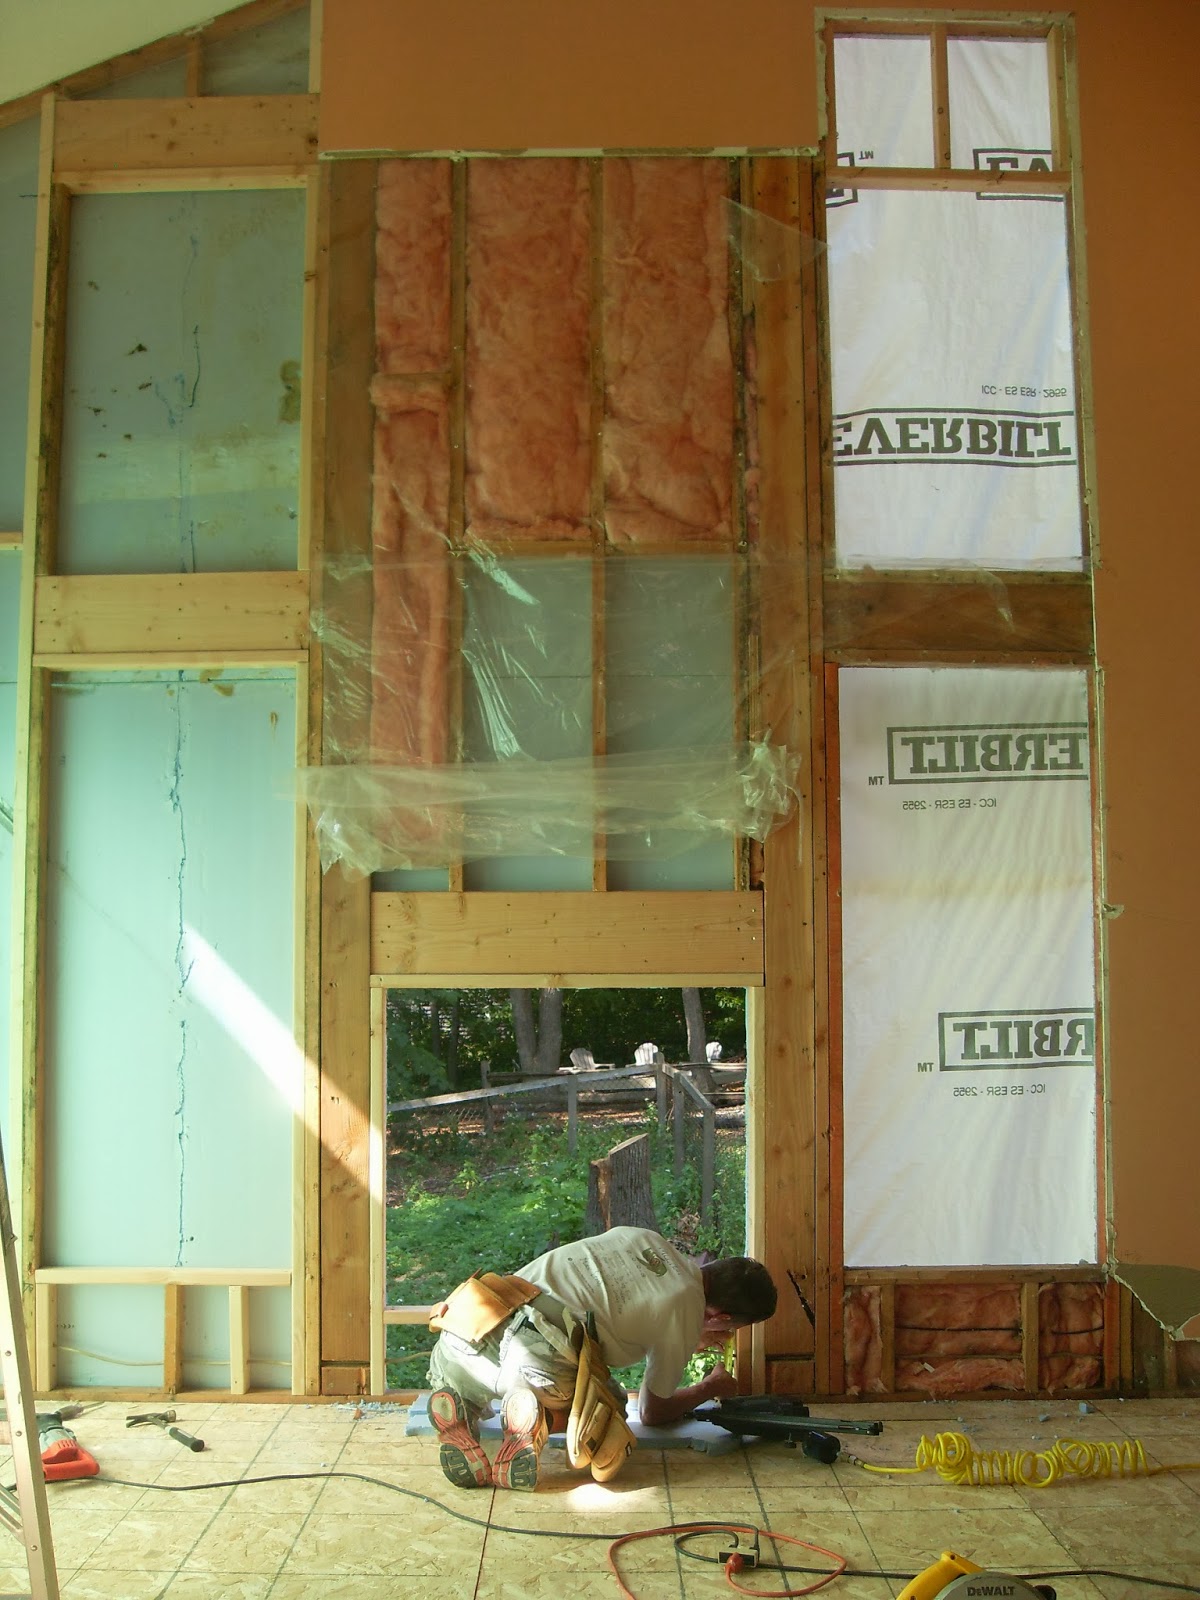
We are adding a new window and a door to the master bedroom thus we built two headers.  First we took off the sheetrock to expose the framing.


Then we took off the plastic and insulation.  I have learned that when you alter the framing on an existing wall you have to support it somehow while you are putting the header in otherwise you risk having the house collapse.  So we built a temporary wall before we cut any of the existing framing (studs).  Sorry I didn't get a picture of that.  It was a thing of beauty.

Once the wall was up, Mark cut the studs at the proper height and then cut the nails that were holding the blue foam to the studs.  We did this so that we could take the framing out but leave the foam and thus not have a big hole in the wall.  All of the headers will have to be inspected before we can install windows (and we have a total of 7 new windows/doors) so it will be awhile between the first header and last header being completed.

After we had our hole in the framing we could build the window opening.  We made the header and installed it.  Then we framed the sides and bottom of the opening.  I learned a new meaning for "cripple" - it's the short stud on the inside of a window frame! Each side has 2 2 x 4s - one goes from the floor to ceiling and the one next to it - the cripple - goes from the bottom of the window to the top of the window.


New window on the left and a French Door on the right 


We are adding a new window in our office.  Since this was just impacting one wall we supported the structure by simply putting a board across the top.  Mark is sawing out the nails that are holding the framing to the blue foam.  We also have to cut the metal strap that helps support the house. We will have to put new strapping in.  Let's hope we don't have hurricane force winds before we get that back in.

Before

After - ready for a new window - well almost. 
After the headers have been inspected we will prepare the openings and install the windows.

We also had to build a header for our new fireplace and Living Room windows.


We started with this......(sorry I should have included the window on the right)

We added a new tall opening window on the left to go with the one that was already there on the right with a Fireplace box in the middle

We also added a new window on the top left and shortened the window on the right  (that part isn't done in this picture but is below) to maintain symmetry

Once we completed the window headers, we started working on the box for the fireplace.  It will bump into the living room about 2 inches but the rest will be sticking out the side of the house.  Since there isn't one there now, we have to build a box to support it.  We affectionately call it the "dog house" since it will end up looking like a dog house from the outside.


Measuring to frame for the hearth
Framed and partially prepared for siding.  
The fireplace box project has been a time filler for Mark.  It's something that he can do when he is working by himself (mostly when I am working at the high school or for my real estate job).  He is still working on building the roof and covering it all with sheathing (translation - board that goes on the outside under the siding).

The past 2 days we have been working on replacing existing doors and windows on the main level of the house.  Lots of progress there but I am too tired to write that post tonight.  I promise I will do it tomorrow night and I will try really hard not to wait three weeks to post again.  It is a struggle working till 7 or 8pm, coming to Hightower, getting dinner and then writing but I will try harder. 

Window removal

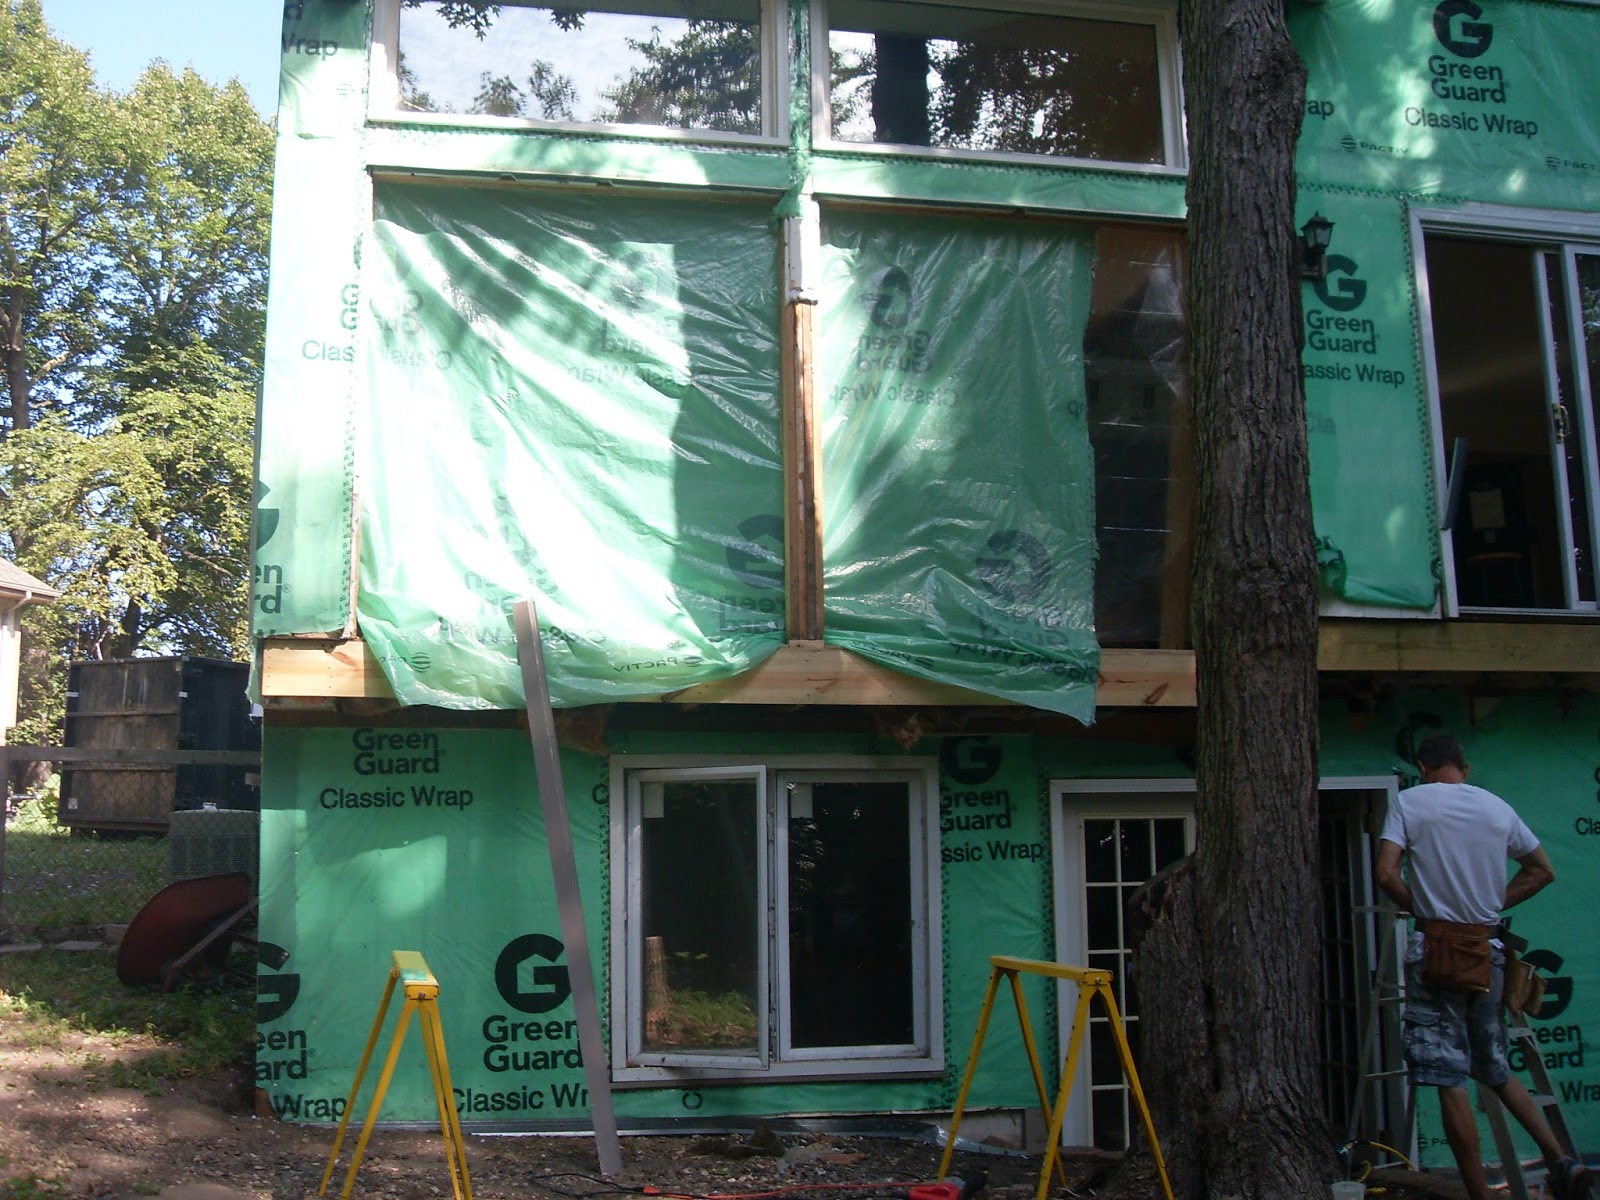
While we were waiting for the inspector to come look at the holes for the deck posts, we worked on removing some of the old windows.  It seems to take about 3 days for an inspector to come out once we call him.  We are getting better about anticipating when we will need him but in the meantime we have to do something else.  Remember our big goal right now is to put new siding on before it gets too cold. But before we can side, we have to put in new windows.  Before we can put in new windows, we have to take out the old windows and put up new Tyvek (that pretty green wrap).  But before we can put up new Tyvek we have to make sure the window openings are the right size.  As you can see there are lots and lots of steps.  It all seems so easy.... put in new window.... but there are 100 other jobs first.

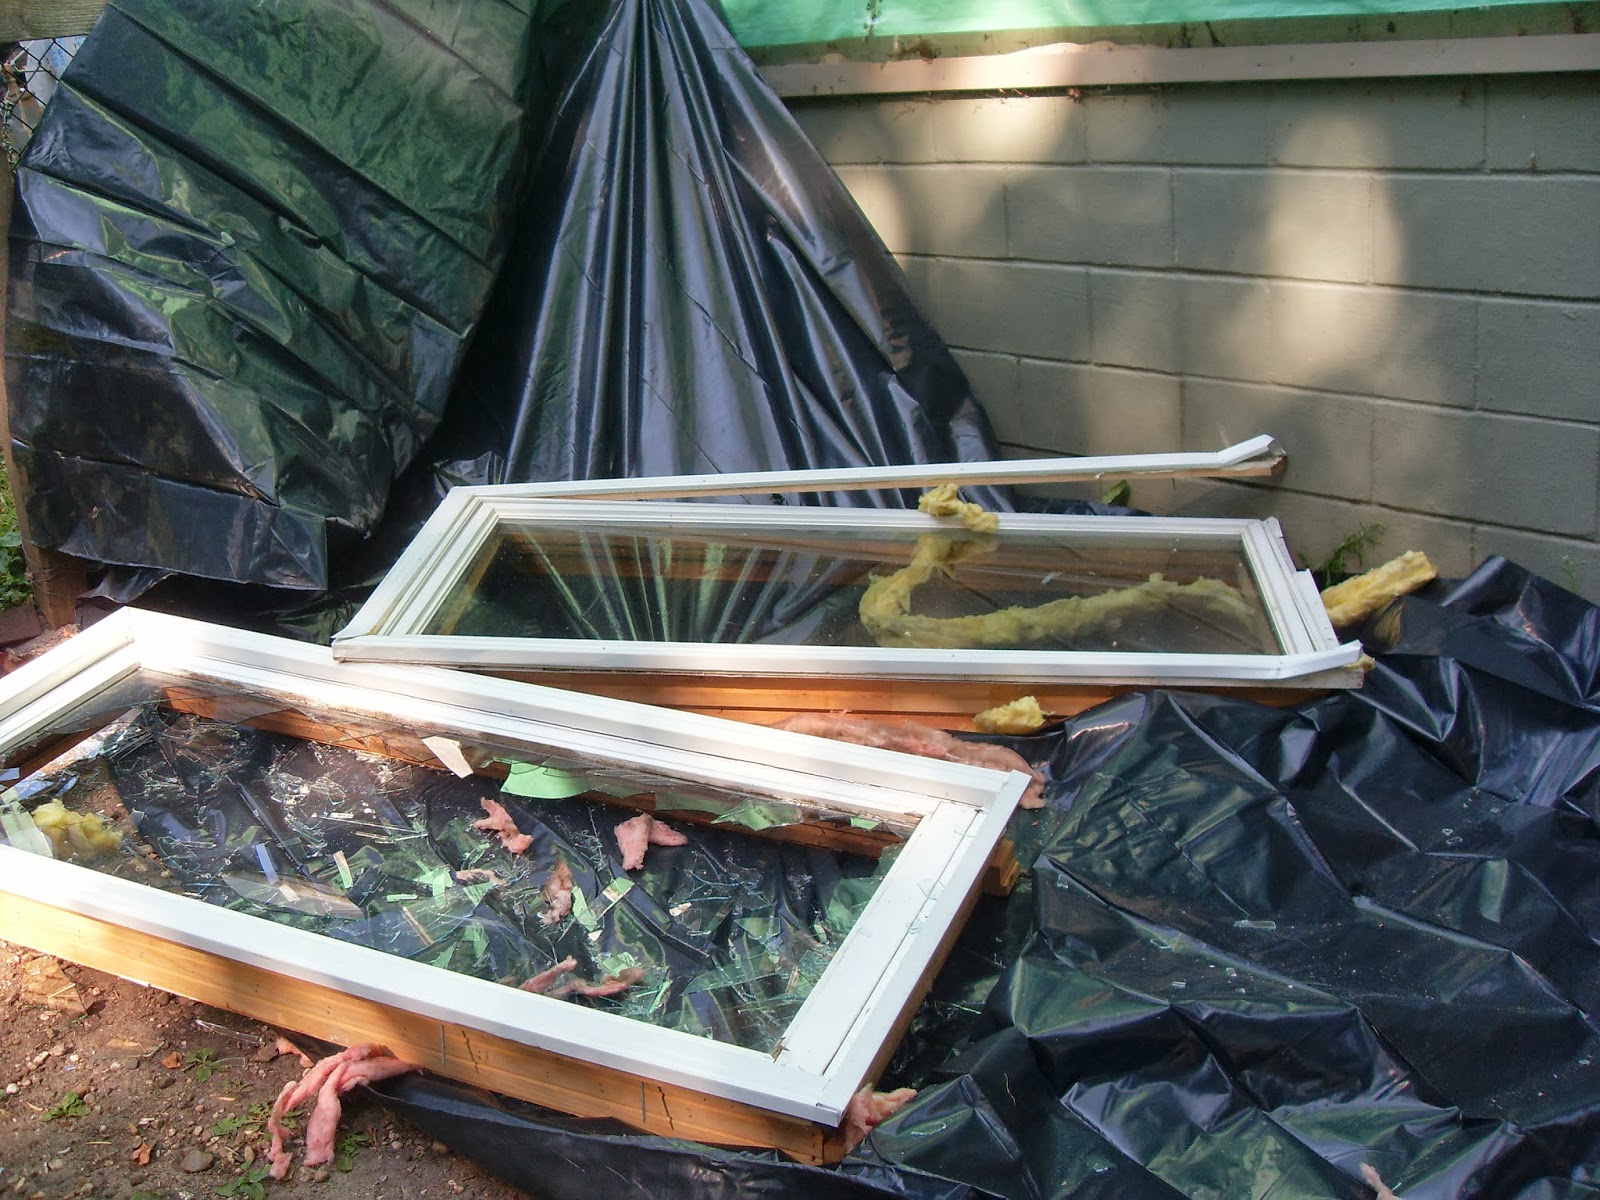
So we started with taking out old windows.  The ones in the Living Room were great fun. We tried a different approach this time.

Mark loosened the window...

Then pushed it out a little......

Then pushed it out some more......

Till it fell out onto the plastic we set up to catch it..... Well almost 
Then it was time for the lower window.....

This one fell right on the plastic and didn't hardly break....

Destruction is his middle name....

I got out the shovel to clean up the mess..... but please wear shoes if you come to visit us.
We are putting in some new windows as well. The prep work for these windows is to build headers to support the wall/roof once we cut the studs so the window can fit in.  This is another project that we have been working on while waiting for the inspector.  See next post for the gory details.

More deck work

Once we had a frame for the deck the next step was to dig some holes for the footings for the posts.  The plan calls for 8 post - 6 for the lower decks and 2 that will support the deck off the Master Bedroom.  We could dig the holes with shovels but since we have to:
1) dig where the landscape rock is
2) expect to encounter tree roots in a couple of places
3) dig holes that are 12" in diameter, 42" deep and 18" for the last 6 inches

We decided to rent a post hole digger.  We opted for the "one man" towable machine.  Those of you who saw my facebook post know it was quite a challenge for Mark and I to control the monster and that it was 100 degrees when we did it.

All was peachy as we got started.  Doesn't he look excited to be having his picture taken?

We towed the machine to our house knowing that we couldn't get it through the gate to the back yard.  The fence opening is 38" while the wheel base is 42".  That's was only a minor inconvenience since we have a couple of places in the fence that were smashed by falling trees.  All we have to do is push it down the hill, slow down, turn it between two trees, go over the fallen fence but keep the momentum up to make it up the slight upward grade in the back yard.  Oh it was no problem.  Now that we are completely covered in sweat the real work begins.  

Always one to face a challenge head on, Mark decides we should start at the short end of the deck where the tree and landscape rocks are in the way and the ground slopes downhill slightly.  As we start on the first hole I'm not really sure how this machine works.  We position it where the hole needs to go and Mark says "pull the cord to start it".  It starts like a lawn mower.  I give it a yank and clearly I am "too weak" to do it.  Mark walks to my end, pulls the cord and it roars to life.  Mark goes back to the drill end and pushes it down.  The auger clanks against the rocks, moves to the left and clearly we are off target.  We stop it, re-adjust it and need to start it again.  It will clearly be a very, very long day if Mark has to walk to my end to start it every time so I decide I can do it.  I give it a pull with two hands this time and we're up and running!  Mark pushes down again, it goes a little further and we bind up on something.... tree roots.  Guess this handy dandy machine is great with digging dirt but tree roots not so much.  Stop.  Get the ax.  Chop at the roots. Hit the rocks. Chop some more.  Pick out disconnected hunks of root.  OK looks like we got past it.  Start the machine.  Push it down.  We make more progress.  Up and down it goes.  Then it stops.  Dang.  More tree root.  Where's the ax?  I don't know I can't see through the sweat pouring off my face.  Needless to say the first hole felt like it took 6 hours to dig.  I thought we would never get it deep enough.  But we did and it was the hardest one. The rest will be easy.
Doesn't look like much but it is 3 and a half feet deep
A couple of the other ones had some big rocks in them and of course the digger doesn't just chop them up.  It goes off course so we have to stop and clear the rock with a shovel.  All this so we can put the posts for the deck on some cement deep in the ground.

Two more holes seen from on top of the deck framing
We got all 8 holes dug, were hot, sweaty and exhausted.  All we had to do was put the post hole digger back on the jeep and return it to A to Z Rental.  Remember that route I wrote of at the beginning of this post....."all we have to do is push it DOWNHILL....." Now all we have to do is reverse that path which ended with push it UPHILL.  I took one look at the fence that we had to go over and thought we'd never make it.  But Mark "never say can't" Sinderson had other ideas.  He said "if we just put a board over there, get a run at it, go over the fence and push hard we can do it." So we did.  And then we had to turn the machine and heave it up the last hill all the while slipping in the leaves, dirt and branches that have been accumulating in the "woods" for years.  Without very good footing it was a b*tch getting up the hill but we were determined to do it.  We pulled and pulled and pulled until Mark could stretch a little to grab onto the neighbors fence and we could pull it that last little bit up the hill then it was smooth sailing across the yard to the jeep. I am pretty sure it would have been much easier to just tear down the gate!

We waited a few days for the inspector to come look at our handiwork before we could fill them with cement.  Once we got the OK we headed to Home Depot to get bags of cement and back to A to Z to rent a cement mixer.  I think we should be getting a "frequent renter" discount at A to Z but no such thing exists.  They do have free coffee though!

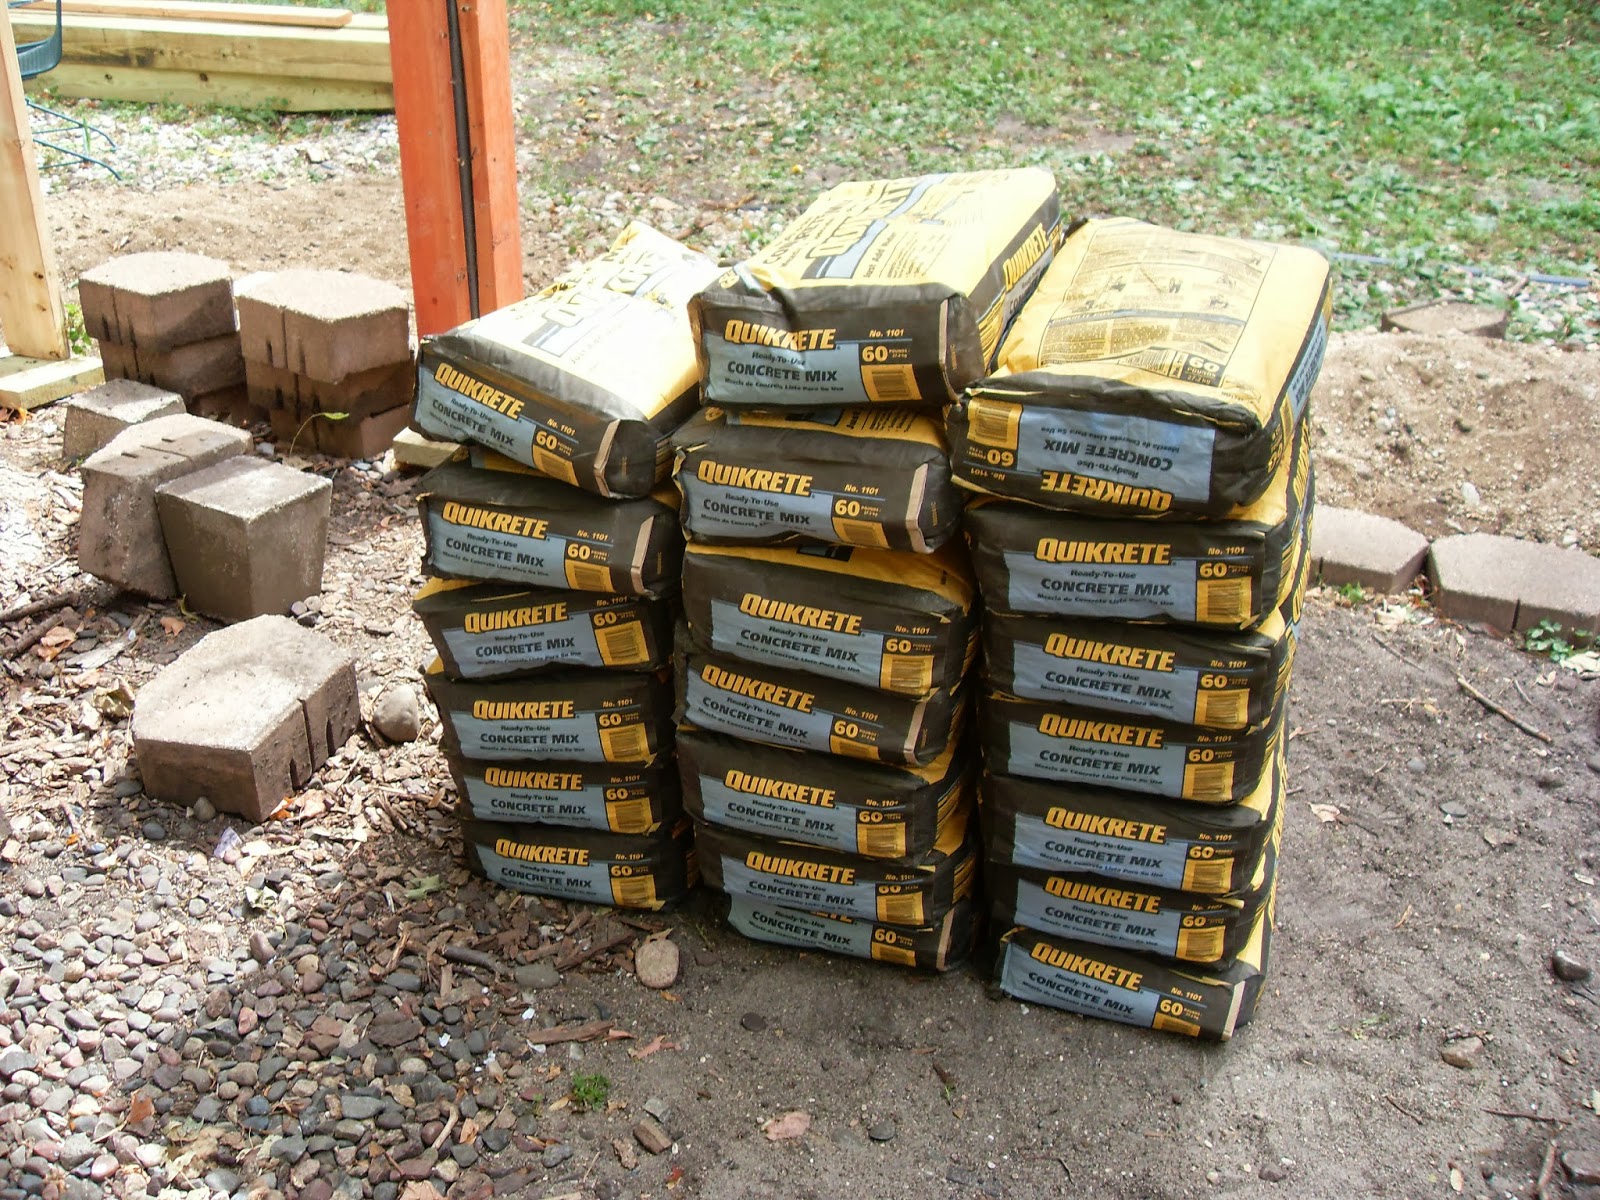
We calculated that we would need 50 bags of cement to fill all 8 holes.  The Honda can hold 20 and the  Jeep 15 so bought 35 bags.  The plan was for me to go back to get the other 15 while Mark and my brother, Tim, got started.  We loaded them up and off we went.  Once at the house, I drove the Honda up on the yard to get as close to the back yard as possible.  I started moving bags - each one 60 pounds.  I discovered that if I half ran I didn't have to hold them as long so I went as fast as possible.  If anyone was watching I am sure they would have wondered if I was part of a relay race!  Mark was in the house somewhere but I don't remember what he was doing. I am sure it was important. So I unloaded the Honda and made a pile by myself:
20 - 60 pund bags
And then I unloaded the Jeep:
35 - 60 pound bags
If someone had told me when I got up that morning that I would haul 35- 60 pound bags, I would not have believed them.  Tim arrived with the cement mixer so I took his truck and headed back to Home Depot to get 15 more bags.  It was slick this time.  I didn't move a bag.  Three HD employees used a fork lift to pick up the pallet, move it to the bed of the truck, unload 15 bags and then put the pallet back.  I still had to move them from the truck to the back yard but that was way better than loading and unloading them. As soon as I finished moving them, the boys figured out we would really need 60 bags so back to HD one more time.  Since I was running back and forth I didn't get any pictures of them pouring the cement.  Several holes were filled by this time - 5 I think so only 3 to go.  I got more cement, Tim had to leave to take his boys to a birthday party.  Art stopped over and ended up helping with the last 2 holes IN THE RAIN.  What a mess.  The empty bags were all over the yard, getting wet.  We scrambled to find things - wheel barrows, garbage cans, recycle bins - to cover the freshly poured cement.  And we cleaned up in the rain!  

That was last weekend.  This week we spent a couple of days putting in the posts and now are ready for decking. 

Ready for Decking
But first, we will throw down plywood so we can walk on the surface to put windows in.


Monday, September 2, 2013

Laboring on a new deck on Labor Day Weekend

We hit a very EXCITING milestone on Labor Day weekend..... we built the first new part of our house!  The DECK.  We have a great southern exposure in our back yard so having the ability to have a nice deck to enjoy the sunshine and view was a big reason we liked this house.  


Getting Started
Lots of wood was delivered on Friday so we got to work first thing Saturday morning.  Tool belt in place, Mark was ready to go.  The first order of business was getting the outside edges (I am sure they have some special name but it's just a box to me!) in place then we would put up the joists (how's that for a building term - those are the boards that go under the deck surface that we walk on from the house to the outside edge).  My brother, Tim, was again an invaluable part of our team.  Also joining us was Randy Thompson and Art Felgate (you may have seen him in the fireplace removal post).  There is no way we could have built this deck without their help.  Thanks, guys!

The outside frame is done
We had our little helpers, too.  Bennett and Gavin had a great day playing in our yard with Dixie and Lucy (the neighbor dog).

Bennett being adorable in an outfit that used to be Matt's 


Gavin showing how strong he is hanging on the tree stump

Our poor neighbors had to listen to the "boys" hammer all day long but a ton of progress was made.
End of day 1-  the lower level is done

End of day 1 - all the section 1 joists are in

End of day 1 - keeping the tree 
Sunday we got back at it to build the stepped up part of the deck.  Inside the house the dining room is a step up from the living room so the deck will mirror this same pattern.  Today's job is to build the stepped up part of the deck that will be outside the dining room and kitchen. 


Starting the stepped up part 

Many, many, many hours later....
While Mark, Tim and I built the deck, Gavin and Bennett discovered that they could bang on the cut logs like drums and they would make different sounds.... A homemade xylophone 
Making music

Showing how strong he is

Gavin discovered that he could use another log to make music too!
Viewing their work at the end of the day

Both of the sections on the bottom deck
We worked a long day on Sunday to get most of the second section done before Tim left.  There were a couple more joists to hang and many nails to pound into the joist hangers to make them complete.   Mark and I finished that work today (Labor Day) since we could do it without the help of another set of hand. 

WOW!  What a weekend.  It was a huge amount of work but the entire frame is done for the lower deck.  It was awesome that the weather cooperated so we were not cooking and dripping in sweat all weekend long.

Next we will dig holes for the posts, get them inspected and then put the posts in.  We discovered today that we have to remove a stump that is right in the way of the steps before we can build them so we will tackle that too.  Also at the top of the list will be removing widows (to finish filling our 4th dumpster)  and building headers for new windows and doors.  More building, that's what I like.  We are getting ever closer to siding the house.

More tearing out

We are still preparing for siding by taking out things that are in the way and will be replaced.  Today's (actually Tuesday 8/24) target was the wooden walkway in the front of the house and falling out windows in the living room. (see separate post)

First Matt and I attacked the walkway.
I didn't get a good "before" picture but you can see the steps in this picture.

It took Matt no time to rip off the boards as they were barely attached to the rotten wood underneath.

That drain tile did very little good sitting on the surface of the rocks!

It was so rotted it's a wonder it didn't collapse under our feet.

Matt doing what Matt does best!
While Mark and Tim took out the huge picture windows in the Living Room.  See the next post for their adventure.

Making Room for new Sliding Glass Doors

We knew when we bought the Comet Circle house that we would have to replace the 4 picture windows in the living room.  Everyone who looked at the wall couldn't believe that they were actually windows instead of sliding glass doors.  Two of the windows were just about to fall out so removing them was a very good thing.  No longer would I have to worry about them falling out on someone or about them breaking all over the yard.
First the frame is taken off

Teamwork
Then the bottom frame is pried off
And finally the glass comes out.  Simple since it was falling out anyway
 Once the windows on the right were out, it was on to those on the left. We expected them to be a little tougher since the glass was securely in it's frame. Lots of prying and pounding was needed so its no surprise that Tim hit the glass on the far left window.

A little broken glass didn't slow Mark and Tim down
We learned that the glass was tempered.  Have you ever seen a tempered glass window break? It gets millions of little cracks it in until it eventually breaks apart and you get....... a pile of "diamonds" 

We thought we could catch the glass in the garbage can.... not so much.  But the shop vac sucked it right up
While Tim and I cleaned up the glass, Mark continued to work on getting the window in the other frame out.  He worked on the inside, prying a bit, then the outside prying more. Then he hammered here and there until.... yep he broke a pane of glass too.  Guess he didn't want to let Tim have all the fun.  But Mark broke the pane on the OUTSIDE so all the little bits fell on the ground under where the new deck will be.  If you get to choose which pane to break, I vote for the inside one.  It's much easier to vacuum the pieces off of a wood floor than to dig it out of dirt.  OK so I missed a piece or two thousand.  Now you all have to wear shoes when you come visit.  While I was picking glass out of the dirt, Mark and Tim eventually got both of the windows and the frames removed and thrown into the dumpster.  

Now that all the weight from the windows was gone, we could move on to repairing the rotten floor and jacking up the center post to get rid of the cracks in the wall and make everything level.  The center of the window was 1/2" lower than the sides of the wall.  Our plan was to jack up the center post and put the new subfloor (which is 1/2") under the post along with the piece of 2x4 that was already there so that it would be level.  

First the nasty, rotten part of the floor was cut out.
Is this what they mean on HGTV "Love It or List It" when they say "open concept floor plan"?
Can you envision sliding glass doors here?
Then we worked outside to rig up the jack and boost up the post.  

Mark attached a giant board to the post that was already on the house.  This new post extended down to a jack on the ground (that little red thing at the bottom of the picture).  I was up in the Living Room while Tim and Mark were down by the jack.  They said "When we jack this up, put the sub-floor board under the post, put this little piece of wood in place and then we'll lower it."  Sounds so simple.  They started jacking it up and the post started moving into the back yard.  Really, it was moving out of the house.  It freaked me out so I yelled and they stopped.  I didn't want to be up in the Living Room so we changed spots.  Tim went up into the living room while Mark and I were down at the jack.  My new job was to raise the jack while Mark pushed the post in to keep it in place and Tim did all the hard work with the sub-floor board.  It worked like a charm.  We got everything into place and nicely leveled. 

Everything's in place. 
We are one step closer to siding the house.  Now we are waiting for our new windows and doors to be delivered.  But to make the window and door installation easier, we are going to build the deck in the back.  That will be our Labor Day Weekend project.